How to Use S.E.R.T: Editing Reservation Details and Services
The following guides show you how to edit reservation details and services after you've submitted your event. Whether you need a Zoom cart, classroom technology assistance, or just want to change the name of your event, you're in the right place.
Accessing the Reservation Summary
To make any of these changes, you need to access your event’s reservation summary.
-
- On the landing page, click My Events in the sidebar.
- A list of reservations that have been booked under your name will appear. Click on the name of the event to open it.
- If clicking the event does not show you the below summary, make sure that the Reservation tab is chosen under My Events.
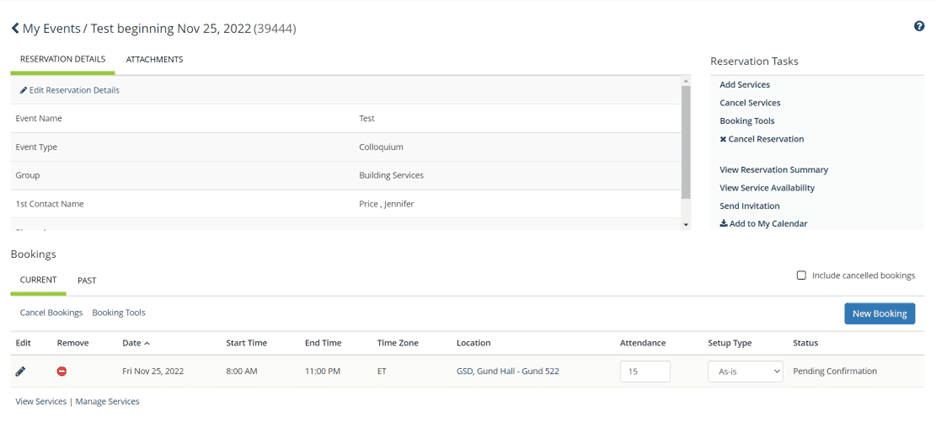
Each of the following tutorials begin from this page.
Editing Reservation Details
This tutorial will show you how to change overarching details of your reservation like Event Name, contact information, and other details. If you need to make changes specific to GSD Now, see How to Post an Event to GSD Now.
- In the box labeled Reservation Details, click the pencil icon next to Edit Reservation Details to open your event.
- This will bring you to a page where you can edit the Event Details, Group Details, Additional Details, and Attachments as you would when initially booking the space.
- Click Save Reservation Details when you have finished making your changes.
Editing Services
The next tutorials will show you how to add, change, or cancel furniture and media requests in your reservation. In SERT, all these requests are referred to as services.
To add a service:
- Under Reservation Tasks, choose Add Services.
- On this page, select the services you want as usual.
- You can only request one category of service at a time: Furniture and Resources or Media Services.
- Click Next Step.
- Check the box next to the booking(s) to which you want to add your chosen service. Not all furniture is available in all spaces and excluded rooms will not appear as an option.
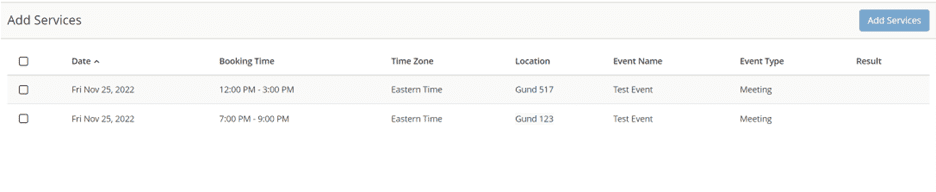
- Click Add Services.
You have successfully added a new service to your request. Please note that a change in your service request may result in your event being moved to pending confirmation, in which case it will be subject to review by our team. You can check on the status of your request by returning to the My Events dashboard and clicking on your event.
To cancel a service:
- Under Bookings, locate the booking from which you want to remove a service.
- If you need to double check that it has the services you want to cancel, click View Services. This will open a dropdown of services related to that booking.
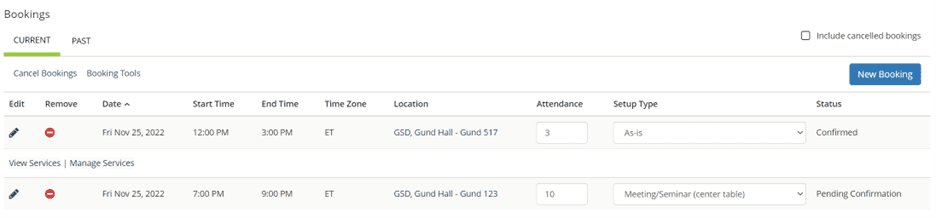
- Once you have found the right booking, click Manage Services.
- Review the list of services on the right-hand side of the page under Services Summary. If you want to remove a service, click the red – icon to remove it from your request.
- From this view, you can also edit the quantity or special instructions for a particular service by clicking the pencil icon beside its name.
- When satisfied with your changes, click Reservation Details to return to your event.
To cancel all services for a booking:
- Under Reservation Tasks, choose Cancel Services.
- In the Select a Service Category dropdown, choose the category of the resource you want to remove.
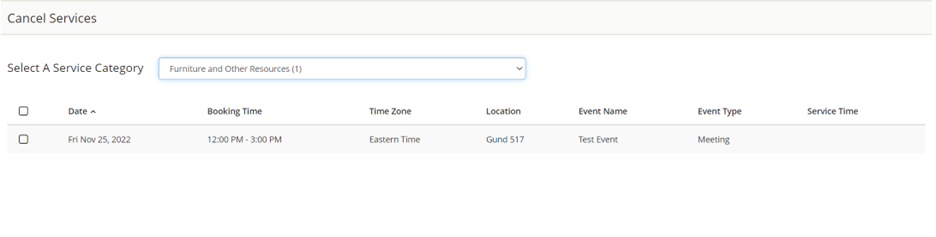
- Check the box beside the booking you want to cancel resources for.
- Click Cancel Services. You have now cancelled all services for that booking.