Resources and Services Guide
Resources that will help you learn and grow! At the GSD, we pride ourselves on offering comprehensive and secure resources and services to cater to your daily requirements, spanning from software to hardware for continuous learning. Explore a wealth of resources at your fingertips tailored to align with your goals. You can access informative articles, engaging video tutorials, immersive webinars, and much more, all designed to elevate your knowledge and sharpen your skillset.
VPN
What is VPN?
Virtual Private Networking (VPN) facilitates secure remote computing by providing access to the GSD network which would otherwise be shielded by our firewall. With an active VPN connection, you can run software that is network licensed and access other internal resources.
Note: the VPN service is not an Internet Connection, it creates a secure connection to the University network using your existing Internet connection.
Harvard’s VPN Service is automatically activated for all GSD Students and will remain active until you are no longer a GSD Student. There is no need to sign-up. Please contact the Help Desk (617-496-3810) if you require any assistance.
VPN Download and Installation Steps:
Open your browser and go to the following URL: https://vpn.harvard.edu
At the login screen you will be prompted to authenticate. Enter your VPN Credentials (HarvardKey credentials and your two-step verification). Press ‘Continue’ to accept the terms.
Follow the on-screen instructions to download and install the software.
After the installation, you may launch Cisco AnyConnect VPN Client from your Start menu (Windows) or Applications folder if you are on OSX
Once launched, make sure vpn.harvard.edu is entered in the Connect dialog box. Next, you will be prompted for your HarvardKey in conjunction with two-step verification.
For more information about the University’s VPN service, visit their IT Help knowledge base article
Email accounts
Members of the GSD community are given access to Microsoft 365; a cloud-based email and collaboration service. The service includes email, calendar, file storage, and Microsoft Office. Visit Harvard IT’s website to learn more about what is included with Microsoft 365.
Email Security and Privacy
In general, Email is a potentially insecure medium, and should not be used for the transmittal of confidential information, or any message you would not wish to see become public or accidentally sent to the wrong person
If you have the need to send confidential information over email, Microsoft 365 does provide a secure, easy-to-use, feature embedded within Outlook called Office Message Encryption ( OME )
Send an encrypted email in Outlook – IT Help (service-now.com)
Harvard IT uses ProofPoint to manage spam sent to University mailboxes. Typically, anything filtered by Proofpoint is legitimately spam but on occasion, a message will be flagged as a false positive. You will receive a ‘Daily Digest’ including any messages quarantined during the day to review, with the option to whitelist any message incorrectly marked as spam.
Manage the Proofpoint Web Console – IT Help (service-now.com)
For any spam or phishing messages that are not intercepted by ProofPoint, Harvard IT recommends you forward the message to [email protected]
Phishing Information Security Incident Reporting | Harvard University Information Security
What happens when I leave Harvard?
Your Microsoft 365 access is terminated when you no longer have an active role at Harvard. For Faculty and Staff this happens fairly abruptly, students however are given a 365 day grace period following graduation.
Visit the following knowledgebase article Prepare to Leave Harvard to learn more.
Managing Your Email and Other Services
The amount of information that each of us receives on a daily basis can be overwhelming.
Below you will find a few tips and guides on how to more effectively manage things like your email, calendar, or tasks while using your Microsoft 365 account.
Create Rules to Filter Email
Outlook offers a feature to automatically process your mail and apply workflows based on things like the sender or subject, allowing actions such as moving messages to folders or categories, marking with different priorities, or forwarding to different email accounts.
The steps to create an Inbox rule differ depending on how you access your Outlook email.
Microsoft’s website offers ‘guided support’ that will tailor the instructions based on your choices, depending on whether you check your email via the web browser, a desktop mail client, on a Mac or PC, or a mobile device.
Manage email messages by using rules – Microsoft Support
Forward Your Mail to your Personal Email
If you prefer not to use Outlook to check your email and would rather consolidate your school and personal email, you can configure Microsoft 365 to redirect your Harvard mail to another email account. Once applied, all messages will arrive in the specified mail account – however, you will not be able to send as your Harvard email address from your personal account
Set up inbox rules for Office 365 email auto-forwarding – IT Help (service-now.com)
Add Multiple Accounts to the Same Mail Client or App
Most modern mail clients now have the ability to add multiple email accounts from different providers, allowing you to use one app or client to manage all of your mail accounts. Microsoft also provides the Outlook mobile app for iOS or Android, which gives the best experience and access to the most features available to your Microsoft 365.
Mailing Lists
The school has a variety of mailing lists used to communicate news and events to the community. Some of these lists are required, like the Student, Staff, Faculty, or Researcher mailing lists.
Students are also subscribed to the GSD-Fellow-Students list, which is an ‘unofficial’ mailing list that students. Fellow-Students is a GSD Student Forum initiative and GSD Students will be automatically subscribed at the start of each school year with the option of opting out at any time.
Setup Mailing List Digests
Mailman, the platform used for Harvard mailing lists, has the option to receive a daily digest of the list activity rather than receiving individual messages as they are posted.
Though it may not be a good idea to receive digests for the main mailing lists, the GSD-Fellow list may be a great candidate since it can generate a significant amount of emails that you may not want to receive throughout the day and would rather review later.
Request a Digest in a Mailman 3 Mailing List – IT Help (service-now.com)
Where are all the Scanners?
Flat Bed Scanners
Quantity: 2
Perfect for Documents, Illustrations and Photos
Max 11-inches x 17-inches
Current locations include: Room L19 and The lower level of Loeb Library.
High Resolution Book Scanners
Quantity: 2
Perfect for books and readings
Both are located in The Frances Loeb Library. The scanner behind the Circulation Desk is available to patrons.
Accellion Secure File Transfer
All GSD students, staff, faculty and visitors are required to follow the Harvard Enterprise Security Policy, as found at http://security.harvard.edu . The policy requires that a secure file transfer service (Accellion) be used instead of email to transmit confidential information. Accellion can be used to send files up to 10GB in size, securely and without relying on an email attachment.
How to Use Accellion
Login to the Accellion secure page (Note you need to use your official Harvard email address and email password to log in)
Give the email address of the recipient
Compose your email message
Browse to the file on your desktop you want sent (be sure to delete the file on your desktop after sending)
Press send
You may select to get a receipt when the recipient actually downloads the file.
For additional help, or with any questions or complications, contact the GSD helpdesk.
What combinations of information would require using Accellion?
High-Risk Confidential Information (HRCI) is a person’s name, in conjunction with:
Social Security number
Credit or debit card number
Individual financial account
Driver’s license
State ID or passport number
Biometric information
Human subjects information
Personally-identifiable medical information
Other confidential information is:
Detailed information about University buildings, activities, or events
Faculty searches
Future University development plans
Grant information
HR records
Student grades
Other (e.g., salary information, HUID#, names of family members)
Examples of documents that would use Accellion
Detail listings (if they contain salaries, name, and/or HUID)
Budgets or proposal documentation which includes name and salary information
HR documents (eg, hire paperwork, visa paperwork, consulting agreements, additional pay forms, direct deposit forms, salary or costing change forms)
ADI Journal forms (if they contain salaries, name and/or HUID)
Reimbursement/Corporate Card/Accounts Payable documents with HUID, name, and/or SSN (e.g., receipt swith personal info, Universal Expense Form)
Timesheets (with name and HUID) or timesheet adjustment form
Off-cycle check requests (with name and HUID)
Computer Lab
The GSD maintains computer lab workstations in Gund Hall, Located in the Francis Loeb Library lower level. This is lab is only available during library hours.
In addition, students may use the IQSS Computer Lab located in the CGIS Knafel Building. This computer lab contains a total of 44 workstations, each are loaded with the following applications: Lab Software
Microsoft Teams
What is teams?
The hub for teamwork in Microsoft 365, Teams aggregates many tools onto one platform for synchronous and asynchronous collaboration – allowing you to chat, video conference, or share files all from the same place.
You can use your Teams client to engage with individuals and groups of participants, or create a Team for more focused, long term projects or to host a course
Here’s a very quick and informative 5 minute demonstration of the Teams interface
Creating a Team
Creating a Team can be self service, however if you are uncertain as to how to set it up or need some questions answered, IT can help out – contact us at [email protected]
If you decide to create your own Team, there are a few things to keep in mind
Naming your Team – We suggest using an easily identifiable Team name, prefaced with ‘GSD’ like ‘GSD Course 1221 Fall 2020′ or ‘GSD STU1101 Fall 2020.’ This will make it easy for your team members to keep track of their teams
Adding Owners – If you create your own Team, it would be a good idea to add at least one alternate owner. CRG will not be able to manage your Team directly ourselves, so if changes need to be made – having multiple owners will mitigate any delays if the Team’s creator is not available
Templates – We typically suggest selecting the Other option rather than choosing one of the predefined templates as these templates tend to lock in settings or features that you may not need or want
Who has access?
Everyone at the University that has an Office 365 account, this includes all GSD students, staff, and faculty.
You can also collaborate with anyone outside the University by inviting them to your Team as ‘External Collaborators’ and ‘Guests’
How do you get it?
Teams is available across all major platforms and devices. You can choose to use the web client in your preferred browser, or install the desktop client for Mac or PC.
The desktop client now comes with the new version of Office, though you can also download the client directly through the Teams website
You can also use the Teams web client by logging into your Microsoft 365 account and launching the Teams app, or by logging into the Teams website directly: https://teams.microsoft.com
There are also apps available in the Android Play store or Apple’s App store for the iPhone or iPad.
What are the features?
Chat
The most significant feature of Teams is Conversations, its chat component
Similar to Slack, Teams allows you to have threaded, asynchronous chats with any participant.
There are three types of conversations you can have:
Private Conversations – You can chat directly with individuals, or a group of participants without belonging to a Team
Team Conversations – within a Team, you can create a post visible to all team members, who can then add to the threaded conversation
Team Private Channel Conversations – Within a Team, you can create Private Channels and invite only a subset of Team members to participate, these chats are not visible to all team members
File Sharing and Storage Quotas
There are almost no limitations in terms of type or size of files you can store in Teams and the quota per Team is high, you should not ever worry about running out of space.
Microsoft Teams stores files using the same technology used by Microsoft OneDrive, which we use for personal file storage.
In fact, you can access your OneDrive from your personal Files section on the left-hand navigation bar.
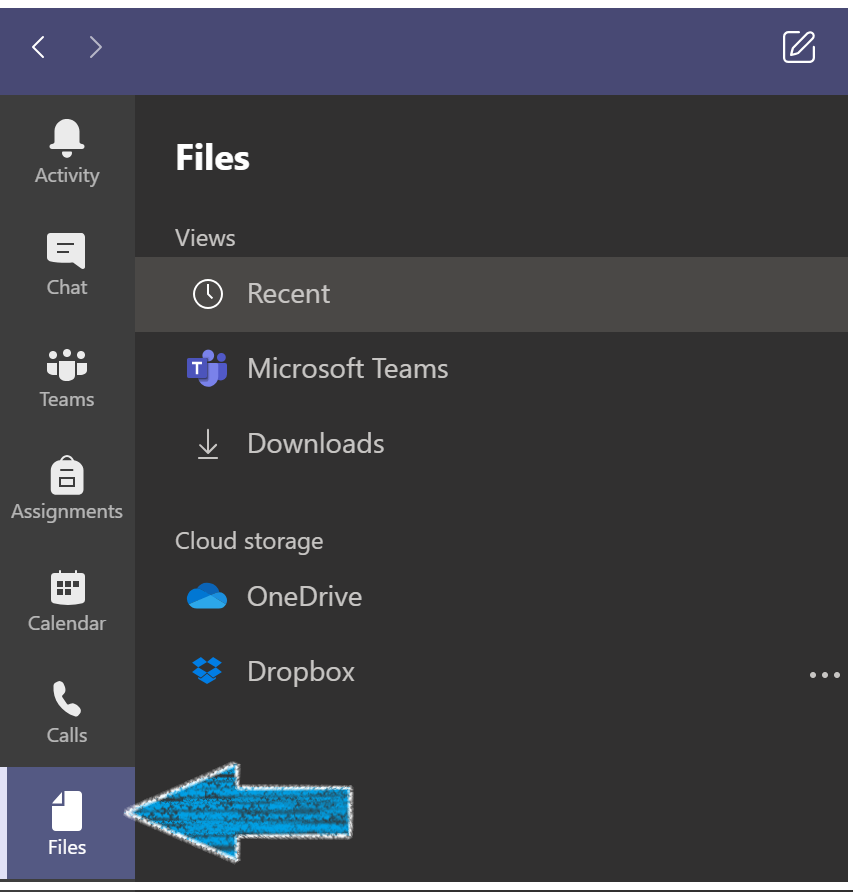
Teams Personal Files Menu Item
Every time you start a new chat, create a new Team, or add a Channel to a Team – it creates a new Files section specific to that instance and only people in the conversation have access to those files.
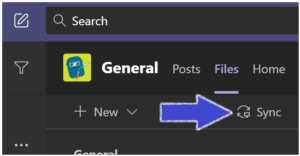
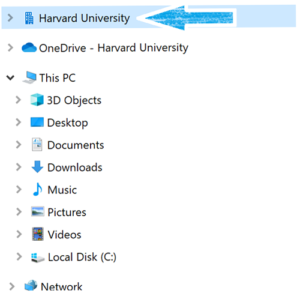
You can access a Team’s files directly in your Teams client, or if you prefer you can sync the files to your computer and work with them as if they are stored locally – just like in OneDrive
Historically, syncing files to your desktop would mean that you may run out of space quickly. However with OneDrive’s Files on Demand feature, this should no longer be the case. Files give the appearance that they are stored locally, and you can interact with them just like they were, however only your most important files are stored locally – the rest are stored in the cloud and do not take up any space on your computer.
Video conferencing
Video conferencing in Teams is very robust and, though not as fully featured as Zoom, does rival Zoom.
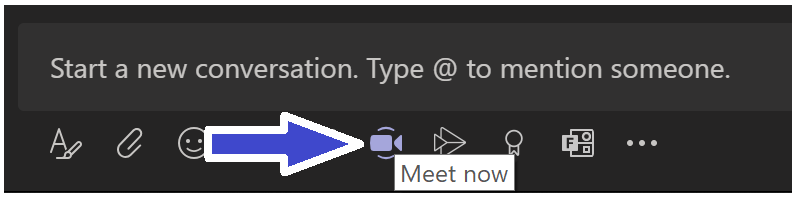
Meetings can be scheduled and guests can sent invitations, just like in Zoom, but the real power of Teams video calls is the ability to start ad-hoc meetings with one click, either within a chat or within a Team via the Meet Now button. Using Meet Now, every member of the Team or Channel will automatically be notified that you would like to have a meeting.
Click Meet Now to start a Team meeting
Live Events is the Team’s webinar feature that is available to everyone.
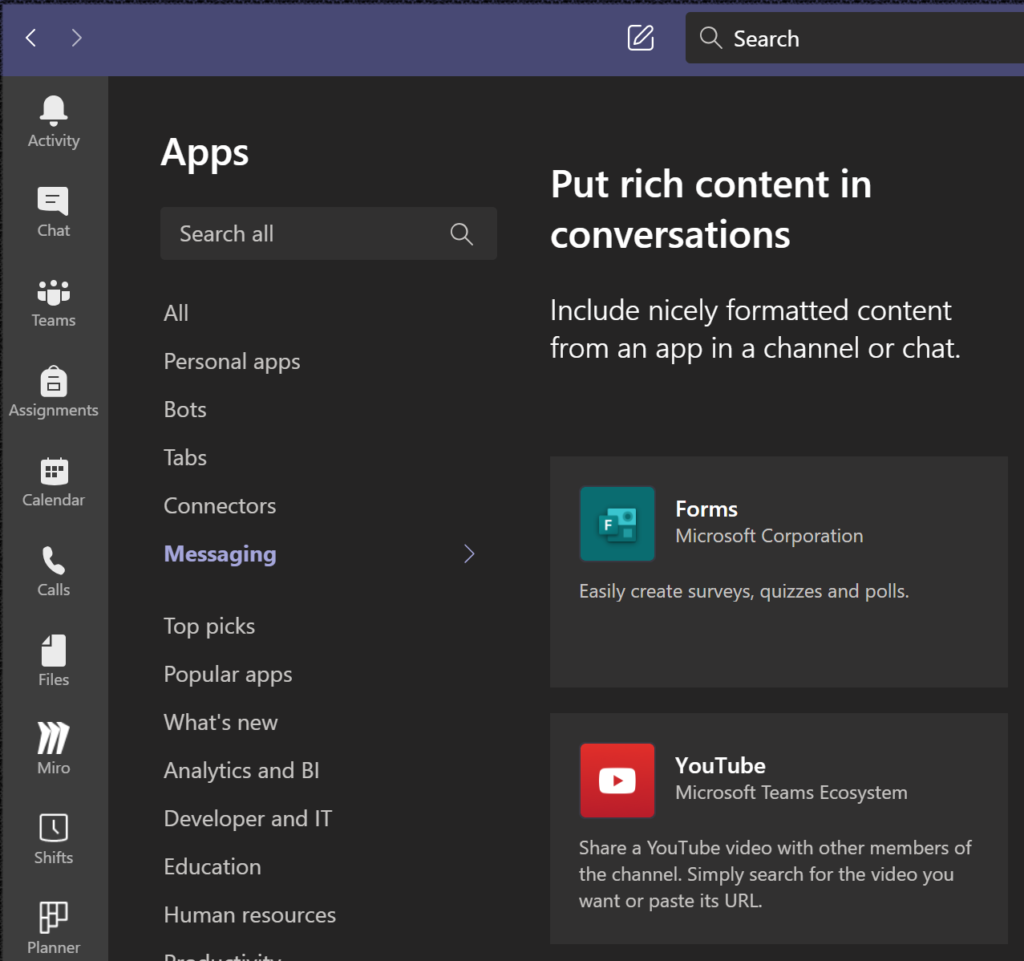
Apps
You can add apps to your Teams client for your personal use or add them to one of your Teams
Apps are a way to extend the functionality of Teams by integrating other services
They can either be other Microsoft 365 apps or 3rd party apps like Zoom or Miro
A list of available Teams Apps
Any Microsoft 365 apps should be included with our subscription, and are automatically available to add to Teams.
Office Hour Signup Tools
Although the GSD does not have an official tool for managing office hours, here are two options we recommend for instructors.
Canvas
Course instructors can use the Scheduling Tool within Canvas to publish office hours for students enrolled in their course. Once the office hours are published, Students can select the “Find Appointments” button to view their instructor’s availability and make an appointment. What is the Scheduler? Watch this YouTube video to see how it works.
Microsoft Bookings
Microsoft Bookings is an online scheduling tool available to Harvard GSD Faculty, Staff, and Students. Bookings allows users to set up calendars and manage availability for themselves, so that others may book appointments. When you launch Bookings, you’ll be prompted to specify your availability and customize a bookings page that you can share with your students. Here’s a brief video that demonstrates how you can set up Bookings to meet your needs.
Render Services
Introduction
CRG is starting a pilot program to offer virtual computing by leveraging Microsoft’s Azure cloud platform.
This resource can be used to outsource rendering from your computer but is not meant to be a replacement for your computer. You will not be able to install your own software, applications are pre-installed by CRG. Initially, we are focusing on Rhino with V-Ray.
You can access your virtual computer either through a compatible web browser or through Microsoft’s Remote Desktop application. Launching a session through your browser is a quick and easy way to start a session. However, the Remote Desktop application will offer a better experience, including the option to access files and folders stored on your local computer – making it easier to move files back and forth between your computer and the virtual computer.
Download the new Remote Desktop app for Windows
Download the Remote Desktop app for Apple devices
You cannot reliably store files on your virtual computer for any length of time. So, be sure to remove your files before ending your session either by uploading them to a cloud storage service like OneDrive or DropBox or by copying them to your local computer.
This virtual computing service is a shared resource so during peak periods you may experience reduced performance.
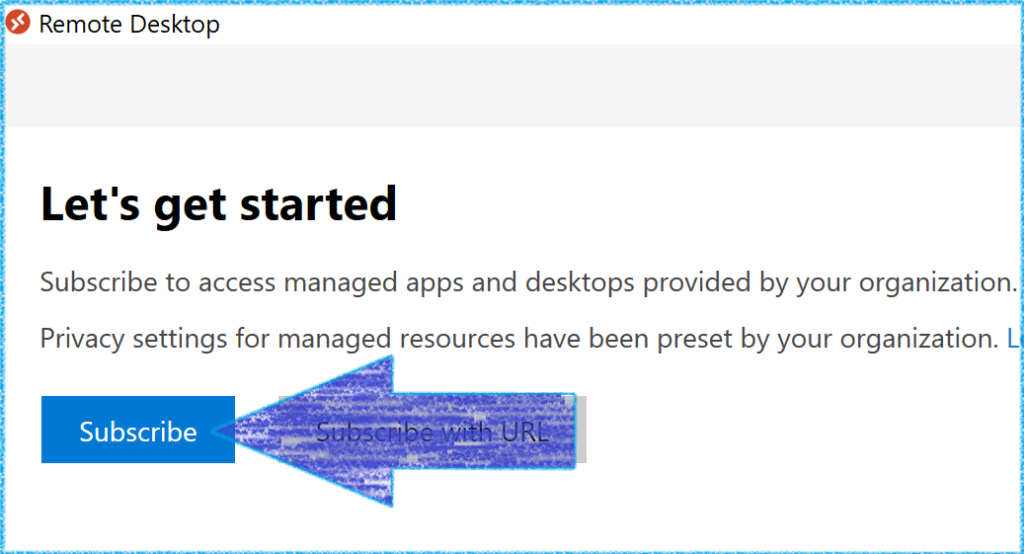
How to connect
To access the CRG’s Virtual Desktop environment, either login to the Remote Desktop Workspace in your web browser or click the Subscribe option in your Remote Desktop client
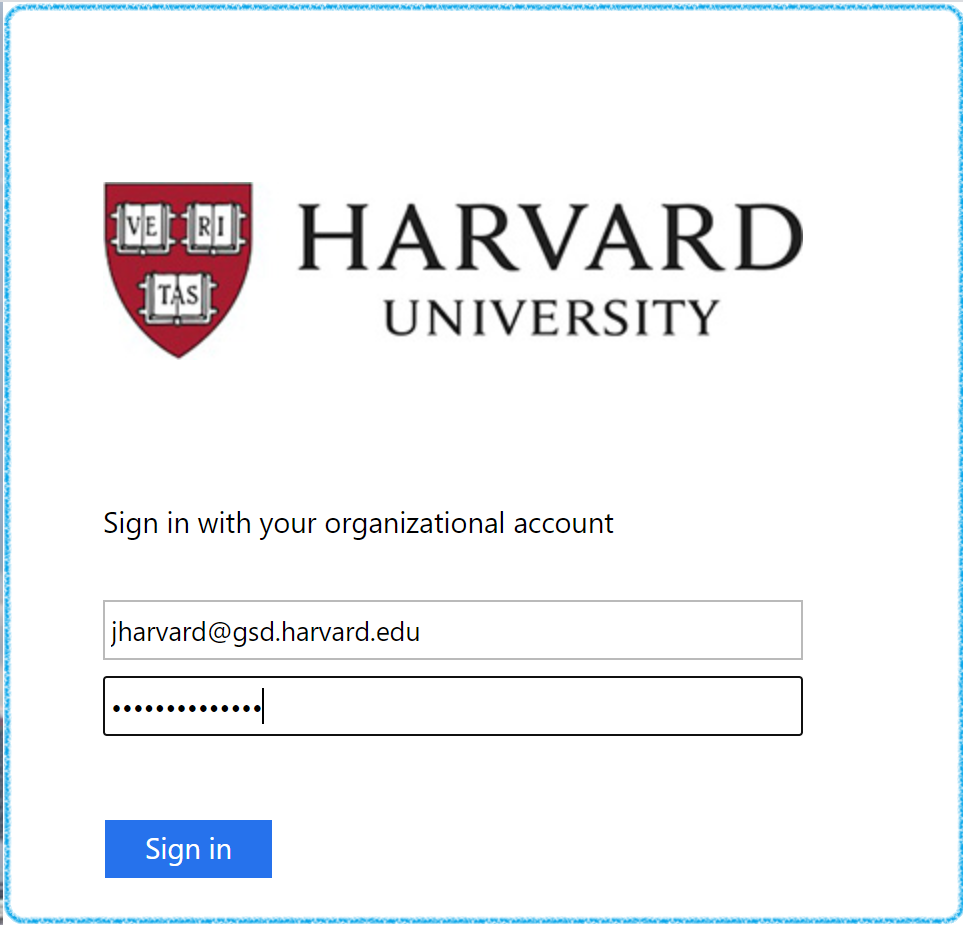
When prompted for authentication, use your HarvardKey credentials
Note: If you are using the Mac Remote Desktop client, you may need to subscribe to the Virtual Desktop feed using the URL:
https://rdweb.wvd.microsoft.com/api/arm/feeddiscovery
You should then see the resources assigned to you
Launch the Default Desktop shortcut to enter the Windows Desktop of one of the remote virtual machines

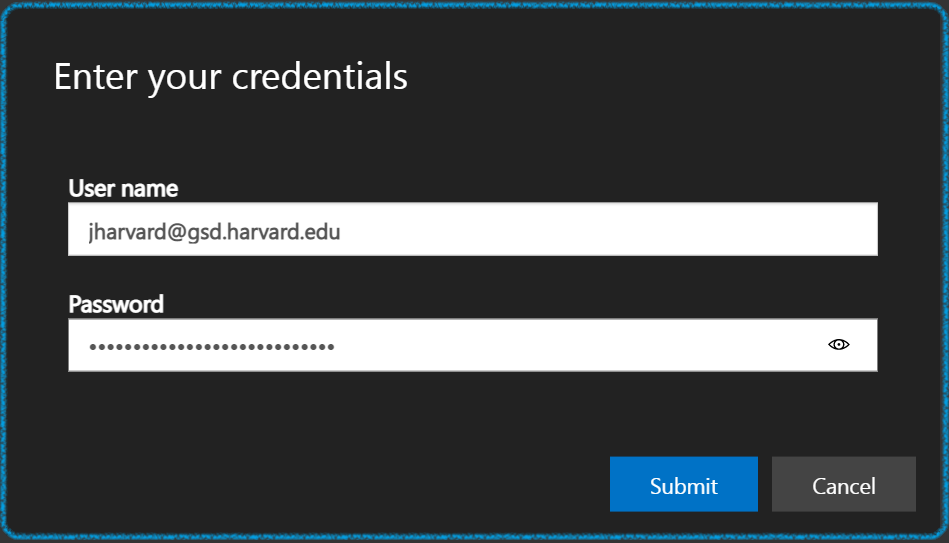
You may be prompted to allow access to your local computer resources
Click to allow and then enter your HarvardKey credentials again when prompted
You should be brought to the desktop of the next available shared virtual machine
Rhino and V-ray are preinstalled, however you will need login to Rhino on the first launch
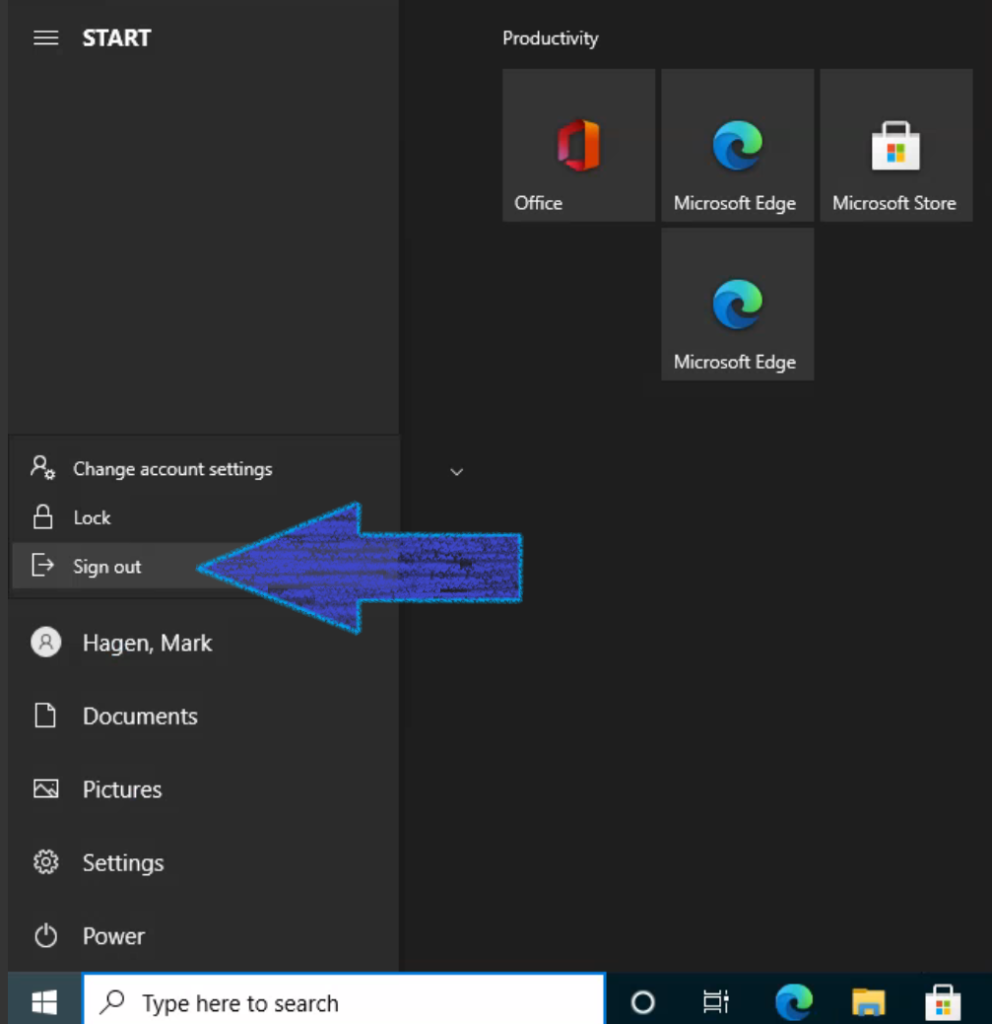
Once your render is completed, be sure to remove your files from the virtual machine and disconnect your remote session by clicking the Start menu, right-clicking on your profile and choosing Log Out
Windows on a Mac Using Parallels
Parallels can be used to create Windows Virtual Machines on a Mac computer, allowing Windows to run in parallel to the Mac OS. This will allow Mac users to install software only available for the Windows platform
To get started, you will need to purchase a subscription of Parallels and obtain a Windows product key
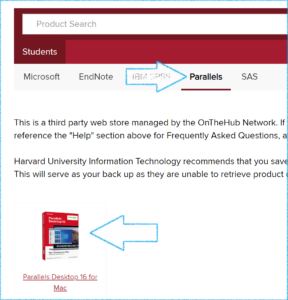
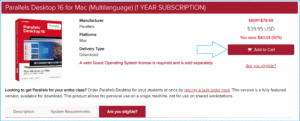
Discounted subscriptions for Parallels are available through Harvard’s software vendor, OnTheHub, from Parallel’s website directly, or a free 14-day trial is also available to evaluate Parallels before subscribing.
Note: These subscriptions are for the Parallels for Education license, similar to Parallels Standard Edition, which limits the amount of RAM and CPU cores that can be dedicated to a virtual machine, the Pro version removes these limitations but is not eligible for the discount
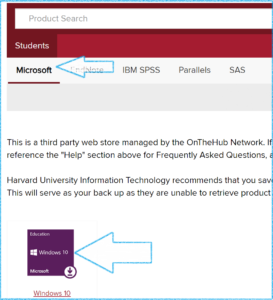
Next, you will need a Windows 10 Product Key
Harvard’s software vendor OnTheHub provides free Windows 10 Education product keys for registered students
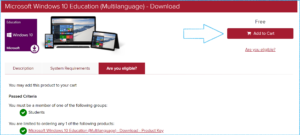
Be sure to save your Windows 10 Product Key in case you need to reinstall Windows later on – either saving it to a file or emailing it to yourself
Once your Parallels subscription is setup, and you’ve downloaded the parallels app, and have obtained your Windows product key, you can follow the Parallels documentation to install Parallels for either Intel or M1 Apple computers
Computer Recommendations
PC or Mac
It is generally a matter of preference to select a Mac or PC
Most of the core software that are used run very well on both Mac and Windows. This includes the Adobe suite, AutoCAD, Rhino. Some software are Windows-only, like ArcGIS Pro, Autodesk Revit, and some of the more specialized Rhino/Grasshopper plugins just to name a few.
Your decision should be made based on your comfort and preference, and how much you expect to be using the software.
Hardware Specifications
Windows Laptop
Basic Recommended Specifications:
- Intel 11th generation Core i5 CPU with built-in Intel DirectX 12 GPU or AMD Ryzen 3000 equivalent
- 16 GB dual channel DDR4 RAM
- 512 GB NVMe Hard Drive
Apple Laptop
Basic Recommended Specifications:
- Apple M1 Chip with 8-Core CPU and 10-Core GPU
- 8GB unified memory
- 512GB SSD storage
- 16-Core Neural Engine
Better Recommended Specifications:
- Intel 12th generation or higher Core i7 CPU with built-in Intel DirectX 12.1 or higher GPU or AMD Ryzen 7000 equivalent or higher (Core i9)
- Discrete DirectX 12.1 or higher GPU instead of built-in GPU
- 32 GB dual channel DDR5 RAM
- 1 TB NVMe Hard Drive
Better Recommended Specifications:
- Apple M2 Chip with 12-Core CPU and 19-Core GPU
- 32GB unified memory
- 1 TB SSD storage
- 16-core Neural Engine
Vendor Requirements
Here are some specific requirements provided directly from the software developers.
AutoCAD
Rhino
VRay
Adobe Creative Suite
ArcGIS
Discounts for Harvard Students
Harvard students are eligible for computer discounts! To learn more, visit the link below and supply your HarvardKey credentials when prompted:
IT Perks & Discounts